RSS

Tag Archives: fabric flowers

Week 5 Project – Fabric yo-yo

In my previous post I was using for the center of my multi-layer flower a yo-yo. This is a very simple fabric flower which can be used as an accessorize itself or attached to a flower assembly.

1. You need:

– fabric cut in 2 size circles;

– scissors, needles, thread, beads;

2. Take a circle fabric and bend the margin inside. Start to stitch around as shown in the picture:

3. When you are done should look like this inside:

and like this on the other side:

4. After the whole circle is stitched as in the above picture, you can start to gather the thread:

5. Push the middle inside and arrange the pleats. Voila, you got your yo-yo. It is up to you if you would like to add a bead in the center or leave it empty:

6. At the end I got these small pretty ones:

Now you can use them individually as I did for multi layer  flower or you can create a small brooch by sewing them together

I hope you enjoyed my tutorial!

 
Leave a comment

Posted by on September 26, 2010 in tutorial, Week 5, Weekly projects


Tags: , , ,

Week 4 Project – Multilayer flower

I am back! Well, after 3 weeks off I cannot say I am very happy to be back to a normal life for the next 10-11 months but what else one can do? I have to admit that I was lazy during this holiday, doing almost nothing for improving my techniques, haven’t studied any new pattern but I was thinking seriously to transform this hobby in something commercial and why not, at the end of the day to have other people wearing and enjoying the result of my work. A task to think about for the next weeks and to develop into something concrete.

And as I promissed I come here with the tutorial for multi-layer flower. It is a medium difficulty project which requires more time than for a standard flower. The final flower consists on 3 layers of flower created based on the similar technique and one yo-yo center ( I will post the yo-yo in a different tutorial).

1. You need:

– fabric: i used both a linen fabric and chiffon/silk and in both cases the flowers look great. It is more difficult to work with linen but the result is very nice.

– 3 different size of bowls or glasses for cutting the circles;

– scissors, needles, thread;

2. Cut 6 circles of each size you want to have. I used (12cm, 7cm, 4cm). Fold the circle in half and then again in half, I missed to take a picture of this but at the end the petals should look like a triangle.

For easy work you can now iron the petals to keep the triangle shape when you will start stitching.

3. Continue with all 6 petals of the same size:

And here you have a flower for the first layer:

4. Using the same procedure, create the other 2 flowers. After you created the smallest one, create a yo-yo flower which will be the center of your big flower. Sew this yo-yo in the center of the smallest flower:

5. Now you are almost done. You can sew or glue the 3 flowers one over the other and this is the final brooch:

Hope you enjoyed.

Have fun doing this yourself!

 
1 Comment

Posted by on September 4, 2010 in tutorial, Week 4, Weekly projects


Tags: , , ,

Week 4 Project – Black linen multi-layer flower

I plan to poste the tutorial for this flower. It has a vintage note and it is very elegant.

I will be travelling and then on holiday by mid September. Hopefully when I will be back I will post more about my hobby-work.

Full tutorial here.

 
Leave a comment

Posted by on August 1, 2010 in Fabric Flowers, tutorial


Tags: , ,

Week 3 Project – Organza rose

As promissed I come back today with the few steps of this nice and tiny organza brooch.

As the project was done during few days due to long weekend spent out of Prague and other projects priority, pictures are taken on few steps and days.

1. You need:

– organza;

– scissors;

– needle;

– thread;

– candle;

– beads;

2. Cut circles of different sizes. 3-4 of each size.

3. Cut each circle in half and prepare a little candle. Using the techique from Organza flower carefully melt the margins of the half circles.

4. Now you can start building up your rose. Start with the small petals and sew one by one. You stitch the first petal till middle and then add the second one.

5. You continue this way till you are satisfied with the size of your final rose.

6. Now you can start to gather the threat and carefully create the rose.

7. Sew around and fix the petals. If you like you can keep it like a rosebud or you can open it more and sew few beads in the middle. You can attache on the back a safety pin and wear it as a brooch.

Hope you enjoyed as I did!

 
2 Comments

Posted by on July 10, 2010 in Fabric Flowers, tutorial, Weekly projects


Tags: , , , , , , ,

Coming soon – Organza rose


 Tutorial here!

 
Leave a comment

Posted by on June 30, 2010 in Fabric Flowers


Tags: , ,

Week 2 project – Organza flowers

Today I decided to post another simple flower. I thought this would be nice to offer as a present to a granny or for myself to wear it with a not very sophisticated dress, one evening while having a dinner out. Can be used as a brooch, attached to a pin or ribbon and wear it in hear or for non-conformists, attached to the shoes.

1. You need:

– fabric, preferable organza or tule, however the kind of fabric containing plastic;

– scissors;

– needle and pins;

– thread;

– candle;

– beads;

– a bit more patience.

2. Cut circles from the fabric. You would need 4 sizes x 4-5 pieces.

3. Now you need to light up your candle. It is good to stay in a place without wind to have the candle’s flame not moving. Take one by one the circles and closed up to the fire let them melt a bit. Be careful as containing plastic, the fabric is melting very fast and it might happen to burn more than you want.

4. After you finished all circles, you can try to build up your flower. You can use some pins to put together all petals.

5. Choose some beads you like and using needle and thread start to make stitched to fix the petals. After you are almost done and satisfied with the result start to add in the middle the beads, one by one if they are a big size or 4-5 together once if they are tiny.

6. Some more stitches and you are done. Voila! 

That’s all! Have fun!


Tags: , , , ,

Week 1 project – Peony

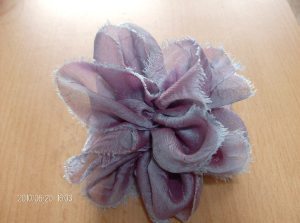
Some time ago I bought this book – Fabric Flowers Fun-to-Wear of Elizabeth Helene Searle. Few of her projects are interesting and I decided to start my blog with a very simple flower from this book.

I would consider the level of complexity – Beginner / Time – 30 min / Effect – Distinct

Can be used as a brooch or made in smaller dimensions you can accessorize your shoes, belt or bag.

1. You need:

– fabric (7.5cm x 125cm strip, recommended torn for the final effect;

– scissors;

– needle and threat;

– tailor meter;

– pins and tailor chalk

2. From the piece of fabric measure and tear a strip of 7.5 x 125cm. To make my life a bit easier I used the tailor chalk and i started to draw on the fabric from one edge to the other triangles with 45 degrees angle for the whole length of the strip.

3. Stitch over the  drawn lines for the whole length of strip, at the end gather the fabric tightly

and here the way it looks after you gather it all

4. After I gather the whole fabric, I started to roll it around and sew here and there to secure the roll. And here we are:

Hope you enjoy doing this yourself!

 
1 Comment

Posted by on June 20, 2010 in Week 1


Tags: , , , , , ,

Welcome to Fabric Flowers blog

Hello traveler,

This is a tentative of blogging and communicating with people from all over the world and sharing experience, tips, techniques on fabric flowers’ hand making process with the ones that are same passionte as I am about creating something with their own hands.

My first attempt here is to share my creations and get feedback from you about the way they look, the colours and techniques I used. What do you like most, what should be improved and at the end, if one of these flowers would be for sale which one you would like to purchase?

And not forgetting about politness, few words about me. My name is Claudia and I can define myself being an easily adaptable person: born in Romania, lived in Finland, now working in Czech Republic and then, who knows which will be the next station. I started this hobby of hand made fabirc flowers from a deep need of creating something with my hands. I am working in an IT company and everything I do it is virtual – communication, human interaction, daily tasks…

I will start posting a flower a week and I will be more than happy to get in touch with you for comments and feedback.

I kindly ask you to not use the pictures and content of this blog for publishing or profit activities without my approval.

Have a great day,

Cheers,

Claudia

 
Leave a comment

Posted by on June 15, 2010 in Uncategorized


Tags: , , , , , ,